So, time to let you know what happened to Zanardi. in the late 90s I was a go getter. Corporate America make room because here I come. One day while driving to a meeting during the summer, I noticed that my coolant temp was getting a bit high. I was only 5 miles from my meeting location, so I thought, no biggie. No more than a mile later, the temperature pegged out, and I had steam rising from the front of the car.
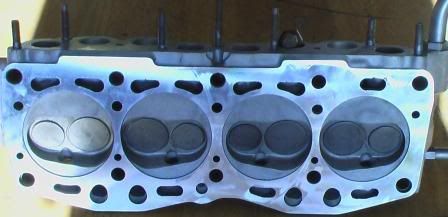
Silly me, I was worried about missing my meeting. I got a tow and yes I made the meeting. But something in me was different. I couldn't help but think of my little friend. Generally I'm excellent at having the ability to focus on the subject at hand. I vowed to put the time in to fix her, and I actually did put forth the effort. I enlisted the help of a famous Fiat racing and repair facility for help. While their reputation was stellar, my experience was less than. They did do a competent job on the rebuild of my transmission, but frustration grew very high for me. I would have them check the head with the standard tests, but I kept getting water in the oil. The gunk on the top right is what I pulled off the oil pump intake.
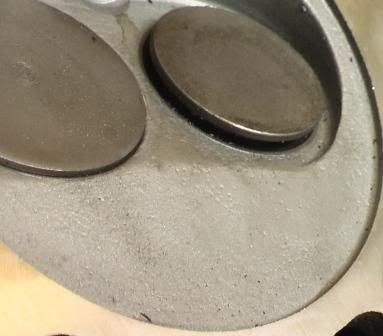
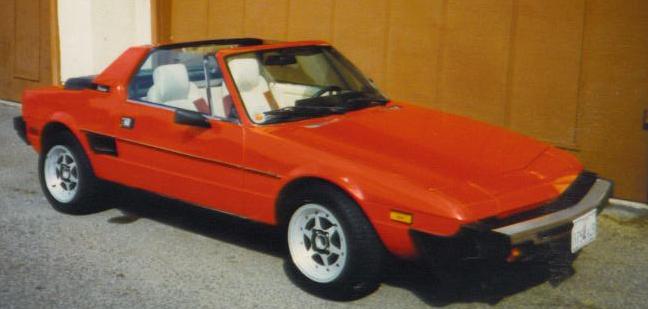
 This is the car with emulsified oil. Wonderful huh?
Yes, a condition like this can be catastrophic. I knew I was having difficulties with something so I never did drive Zanardi like this. Over those 6 years the car was down, I randomly tried different things, but my heart wasn't in it. There were 2 previous attempts to fix the car. Going all the way down to removing the head. At great risk of life and limb, believe me, I towed the car from here to there and back again. But, I never did let the car go. Mostly Zanardi was stored in my garage, and promised that I would get the car the attention it needed. I just knew that at some point, the time would be right to get reaquanted with my old friend.
So, fast forward to today. Its been approximately 6 years since the car has been on the roads, and I'm consulting with the best of the best. There is an excellent support group called XANA at
http://www.network54.com/Forum/12159/At XANA I have gotten the support that I need including motivation, comraderie and meeting other X heads like me.
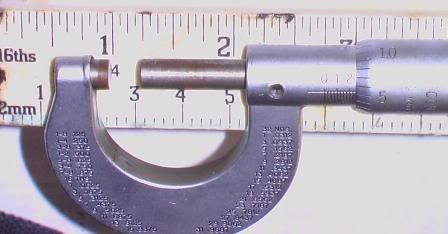
In choosing to rebuild the car, I knew I just didn't want to put it on the road, I wanted to get the car looking better than when I first owned it. As I have once again disassembled the engine, I found a crack in the block that somehow went unnoticed. I began working with a new machine shop called R&D in Costa Mesa CA. John of R&D found that my head was more than .006 inches out of true. Remember, every time I had the head off I had it checked for true. So, the failed attempts to put Zanardi on the road came down to some of my negligence, and the negligence of the previous Fiat facility.
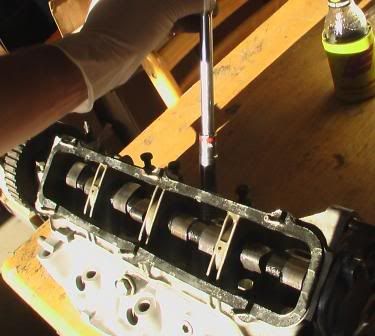
Its easy to get a head rebuilt and trued. Not so much to fix a crack in the block. First order of business was the get the head off. A new friend from XANA, Alex came down, and we first did compression tests, and a leak down test. The evidence was clear that there were problems. Of course I already knew this. One of the problems was that my head had frozen to the block. Something about Aluminum, water and metal causing a bond. Brett of Port Hueneme, a fellow XANA member and awesome Fiat guy heard that I was having issues with the stuck head. He was nice enough to get in touch with me and loan me a special head removal tool that got that B*tch off.
(Brett has an excellent '74 X1/9 that is for sale)
His Ad is at:
http://www.network54.com/Forum/112729/thread/1154050541/last-1154058081/FOR+SALE+1974++X1-9++$3000Pictures are at:
http://s62.photobucket.com/albums/h103/brette10/Next up was to find the crack.
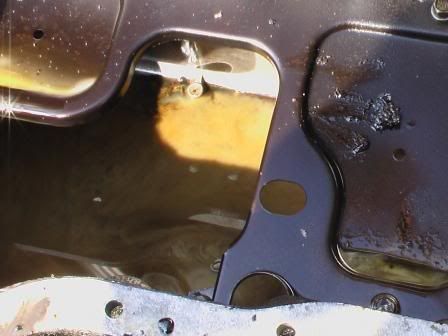
 Viola
Viola In finding the crack, I felt like I was on the right road to understanding what the problem was.
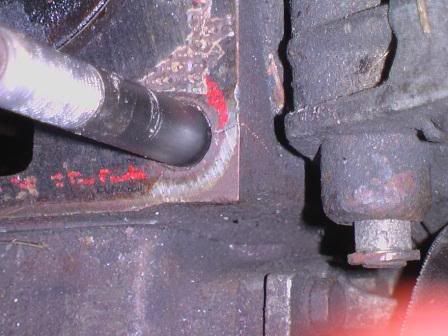
Next up was removing the head studs. Of course the studs were frozen in the block. I highly recommend PB Blaster for anyone that needs to unstick/unfreeze stubborn bolts, studs, etc.
 Quick Commercial from our Sponsor
I did manage to get the studs out after a week of perpetual soaking of the stud threads with PB. I also used some Gin & Tonic, and I learned a few new swear words. Onward and upward.
In mid July, the head was sent out for rebuilding to R&D Performance for rebuilding. As highly touted as the other Fiat shop is, after two failed diagnosis, I won't be getting assistance from them again. The head was easily given a valve job, and the valves cleaned and seated.
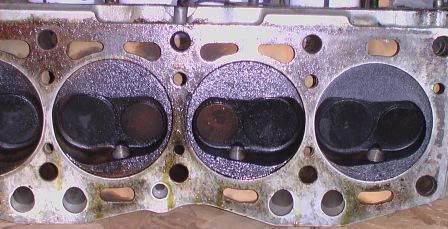 The Before Picture
This past weekend, my friend, Alex, was generous enough to come tow the car down to the same R&D machine shop so I could have my block repaired.
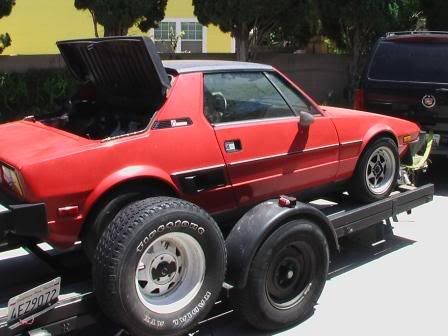 Is the trailer worth more than the car?
The ride to the shop was of great interest. See, Alex's tow vehicle is a newer model Escalade. With 345 odd horse, it gets around. More interesting and of life peril is the fact that Alex has an X that is his Race Car. So needless to say people moved around him. Or should I say he moves them. I think I heard him say, "Well if I hit someone its with your car not mine." Yeah, fun drive. Seeing that Alex is a great resource, I can't really complain.
 I'm quite sure he is thinking of how to antagonize people on XANA
Once R&D and I chose the best route, John went about drilling out the hole and retapping the threads.
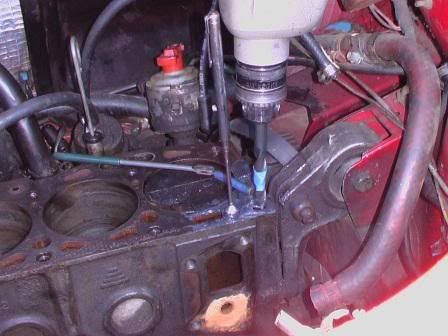 John working
 John tapping the threads
I'm known to be rather frugal. So, while at John's shop I managed to borrow his tap and compressed air to clean out the threads of the other block mounts. This will allow a proper seat of the studs and correct torque. Since the head has been planned, torque is going to be critical.
So, currently I'm finishing up cleaning some parts. I have the piston tops cleaned, and the accessories almost finished for installation. I do need to source an 84 millimeter stud with a 12 by 1.25 pitch. Anyone, anyone? Bueller, Bueller? This was because we drilled out the cracked portion of the stud area to thread the stud in deeper.
The engine has gone from this
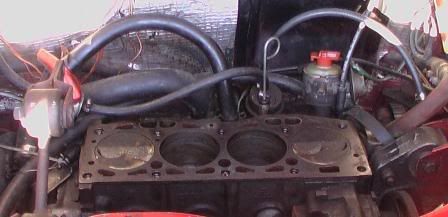 Before
To this
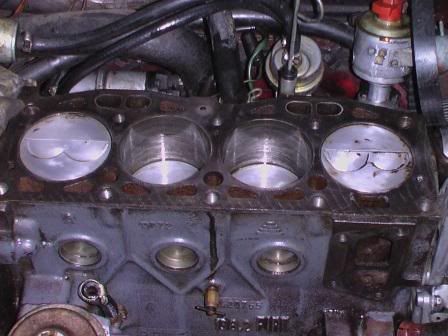 B Level cleaning
Next on the list is to get back my intake manifold. Yes there is a story. I'm still on the fence post about getting the header Jet-Hot coated. I will be painting the accessory mounts for things like A/C and the Alternator Bracket. Sometime about 10 August, I will start bolting parts on.
Stay out of the Ice Plant medians kids.